Monday, 12 November 2012


How to Access “Advanced Appearance Settings” Option to Change Text Size in Windows 8?

Share this article: Facebook | Twitter | Google+ | Reddit | Email | Leave a comment
After receiving so many emails from lots of AskVG readers regarding same problem, today I decided to post this article. Many people who are using Microsoft's latest OS Windows 8, are wondering where is the "Advanced Appearance Settings" option?
Actually in previous Windows versions such as Windows XP, Vista or Windows 7, users could customize the text size and color using "Advanced appearance settings" option present in Desktop Properties (Personalization) window.
But unfortunately Microsoft has removed this feature from Windows 8. But there is a similar option available in Windows 8 to change screen text size.
So if you are also using Windows 8 and want to access "Advanced appearance settings" option in Windows 8, this tutorial will help you.
In this tutorial, we are going to tell you how to change text size of title bars, menus, message boxes, palette titles, icons and tooltips in Windows 8.
We have divided this tutorial in 2 parts:
So without wasting time lets start the tutorial:
METHOD 1: Using Desktop Personalization
1. Right-click on Desktop and select "Screen resolution" option.
Windows_8_Screen_Resolution_Option.png
2. It'll open "Screen Resolution" window which allows you to change screen resolution and orientation. Click on the link "Make text and other items larger or smaller" as shown in following screenshot:
Make_Text_Large_Small_Windows_8.png
3. It'll open "Display" settings window. Alternatively, you can open "Display" window by selecting "Personalize" option from Desktop context menu and then click on "Display" link given at the bottom of left-sidebar.
Here you can change the text size of various items such as icons, title bars, etc by selecting the item from drop-down list and then selecting the desired size for it from the 2nd drop-down box.
Change_Text_Size_Windows_8.png
4. Once you set the desired text size, click on "Apply" button.
METHOD 2: Using Registry Editor
If you want to change other advanced appearance settings which are not available in the above mentioned location of Windows 8 such as background color, border padding, caption buttons size, icon size, icon spacing, scrollbar size, etc, you can change or customize them using Windows Registry.
1. Press "WIN+R" key combination to launch RUN dialog box then type regedit and press Enter. It'll openRegistry Editor. Now go to following keys one by one:
HKEY_CURRENT_USER\Control Panel\Colors
HKEY_CURRENT_USER\Control Panel\Desktop\Colors
HKEY_CURRENT_USER\Control Panel\Desktop\WindowMetrics
Above mentioned Registry keys store all the advanced appearance settings information, so you can customize the advanced appearance settings in Windows 8 by changing the values of various DWORD and strings given in the right-side pane.
Change_Advanced_Appearance_Settings_Windows_8.png
TIP: These Registry keys are same for Windows Vista, Windows 7 and Windows 8. So to make the task easier, you can boot into Windows 7 and customize the advanced appearance settings using Desktop Personalization window. Then open Registry Editor and take a backup of the above mentioned Registry keys by right-click on them and select Export option. It'll create .REG files. Copy those REG files to Windows 8 computer and run them. The Registry scripts will add those customized settings to Windows 8. Restart Windows 8 computer and you'll see the new settings.
That's it. This is how you can access "Advanced Appearance Settings" option in Windows 8.


Transform Windows 7 into Windows 8 RTM without using Customization Pack

Share this article: Facebook | Twitter | Google+ | Reddit | Email | Leave a comment
UPDATE: Tutorial updated to match latest Windows 8 RTM UI.
Finally, the wait is over. After getting so many requests to post a tutorial to transform Windows 7 into Windows 8, today we are happy to announce it. This is the 4th tutorial of our "Transform Windows" series. You can take a look at other 3 tutorials using following links:
Although we have posted a few 3rd party transformation packs in past which help you in making Windows 7 look-like Windows 8 like Windows 8 UX Pack and Windows 8 Transformation Pack but this tutorial has been created for people who love to do the task manually and want to use selected things to convert Windows 7 into Windows 8 so that they can have an idea what they are going to do with their system.
NOTE: Please create a Restore point using "System Restore" before applying anything mentioned in this tutorial so that you can restore your system back to default if you don't like the changes.
After following this tutorial, you'll get the same Windows 8 look in your Windows 7. Following is a list of things which are going to change after following this tutorial:
  • Windows Theme or Visual Style
  • Boot Screen
  • Login Screen or Welcome Screen
  • Start ORB or Start Button
  • Icons, Sounds and Cursors
  • Ribbon UI in Windows Explorer
  • Start Screen with Live Tiles
  • Charms Bar
  • Wallpapers
  • Windows 8 Metro Task Manager
  • User Picture Tile in Taskbar
  • Aero Auto-Colorization Feature
  • Centered Titlebar text, icon and Up Button in Windows Explorer
  • Extras
So without wasting time, lets start the tutorial:
Windows Theme or Visual Style
Windows 8 features a clean and minimal theme which doesn't come with Aero glass transparency and blur effect. You can get a look-like interface in Windows 7 using following themes:
Windows_8_RTM_Theme_Windows_7.png
Download your desired theme using following topics:
You can also check out many other Windows 8 Metro UI inspired themes for Windows 7 in our exclusiveWindows 7 Themes section.
Boot Screen
Windows 8 comes with a new clean and minimal boot screen which looks like following:
Windows_8_Boot_Screen
You can get a similar boot screen in Windows 7 using following article:
Also check out many other Windows 8 metro style boot screens for Windows 7 using following links:
Login Screen or Welcome Screen
Windows 8 login screen looks very simple and doesn't provide any eye candy effects as shown in following screenshot:
Windows_8_RTM_Login_Screen
To get Windows 8 login screen in Windows 7, check out following article:
To get the date and time on login screen, check following topic:
You can also check following awesome Windows 8 concept login screen for Windows 7:
Start ORB or Start Button
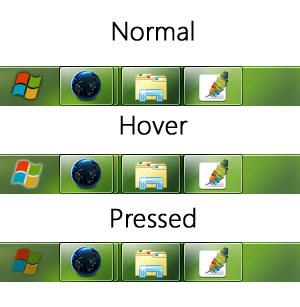
Although Microsoft has completely removed Start Menu and Start button from Windows 8 but Windows 7 userscan replace existing Start ORB with a nice looking Windows 8 style Start button as shown in following screenshot:
You can get this Start button in Windows 7 using following tutorial:
Icons, Sounds and Cursors
Windows 8 icons are almost similar to Windows 7. You can get new Windows 8 sounds and cursors from following topic:
Ribbon UI in Windows Explorer
Windows 8 also features Office 2010 Ribbon UI in Windows Explorer. You can get the Ribbon UI in Windows 7 Explorer using following articles:
Start Screen with Live Tiles
Microsoft has featured a new Start Screen in Windows 8 which looks similar to Windows Phone 7 home screen. It basically shows live tiles of the installed programs in Windows 8.
You can get this new Start Screen in Windows 7 using following articles:
Charms Bar
Windows 8 also comes with a new Charms Bar which is a black sidebar panel which shows some useful shortcuts like Search, Share, Start, Devices and Settings when you move your mouse cursor to right-side of screen.
Windows_8_Charms_Bar_Windows_XP_Vista_7.png
You can get this new Charms Bar in Windows 7 using following articles:
Wallpapers
You can download some cool Windows 8 wallpapers using following links:
Windows 8 Metro Task Manager
Windows 8 comes with new modern and advanced Task Manager which opens in a small window and shows the running programs list.
Metro_Task_Manager
You can get a similar Metro Task Manager in Windows 7 using following topic:
User Picture Tile in Taskbar
Initial Windows 8 testing builds featured new user picture tile in Taskbar notification area. It was added because of the integrated Windows Live services in Windows 8 shell.
If you want, you can get it in Windows 7 using following topics:
Aero Auto-Colorization Feature
One of the most interesting feature of Windows 8 is "Aero Auto-Colorization" which is the ability to automatically configure the color of Aero elements, like the Start Menu, Windows Explorer windows, and the taskbar based on the desktop wallpaper.
You can get the same effect in Windows 7 using following free tools:
Centered Titlebar text, icon and Up Button in Windows Explorer
Windows 8 Explorer comes with good old "Up" button in toolbar. The Explorer window also shows titlebar text along with icon in center.
Official_Windows_8_Screenshot.png
You can get the same in Windows 7 using following tutorial:
Extras
Following are some software and skins which will provide Windows 8 Metro UI feeling in Windows 7. You should definitely have a look at them:
That's all for now. After following all above mentioned steps, you'll get Windows 8 look-n-feel in Windows 7.


Is There Any Way to Enable Aero Glass Transparency in Windows 8?


Whenever a new user starts using Windows 8 final version (RTM), the first thing he/she notices is the removal of Aero glass transparency. When you boot into Windows 8 Desktop and open a program window, you don't get any transparency in windows. This is one of the most frequently asked question about Windows 8, "Where is the transparency in Windows 8? How can I enable transparency in Windows 8?".
Windows_8_Charms_Bar.png
In previous Windows versions such as Windows Vista and Windows 7, if your graphics card was compatible, you used to get Aero glass transparency in windows but in Windows 8 even if your graphics card supports Aero theme, you don't get the transparency. Why?
Actually Microsoft has removed Aero glass transparency feature from Windows 8 just like the removal of Start Menu, Start button and various other stuff. It was done to improve system performance and reduce battery power usage.
So the question comes, can you enable Aero glass transparency in Windows 8? The answer is NO. Microsoft has removed the complete code of Aero glass transparency from Windows 8 source code so you can't get it back.
Many websites are posting about a few tricks to enable a buggy and unstable transparency in Windows 8 which is of no use. If you can remember we have already posted a video revealing this trick long time back at our YouTube channel. This trick involves a Registry tweak to modify "ColorizationGlassAttribute" setting of DWM engine. Check out following video showing the whole method:
Same thing can also be achieved by first applying a High contrast theme and then re-applying default Windows theme. Actually its a bug in Windows 8. You are not going to get Aero glass feature or transparency using this tweak. This trick forces Windows 8 to just draw window borders and everything else remains unchanged. So the transparency which you get using the above trick is not actually a transparency. Its just a blank space which is showing the background stuff. Also its unstable. As soon as you move the program window, it gets massed up.
So there is no built-in way or Registry tweak to get Aero glass transparency back in Windows 8 but there will be many 3rd party software available in coming days which will provide Aero glass transparency in Windows 8. Similar to freeware bringing back Start Menu and Start button in Windows 8 and freeware to customize Start Screen in Windows 8.
In the meantime you can try following freeware which were created to get Windows Vista and Windows 7 style Aero glass transparency in Windows XP but these freeware might also work in Windows 8 (not tested):
So if you want to enjoy Aero glass transparency in Windows 8, just wait until we get some software to bring the good old transparency back in Windows 8...